A great spot to take photos.
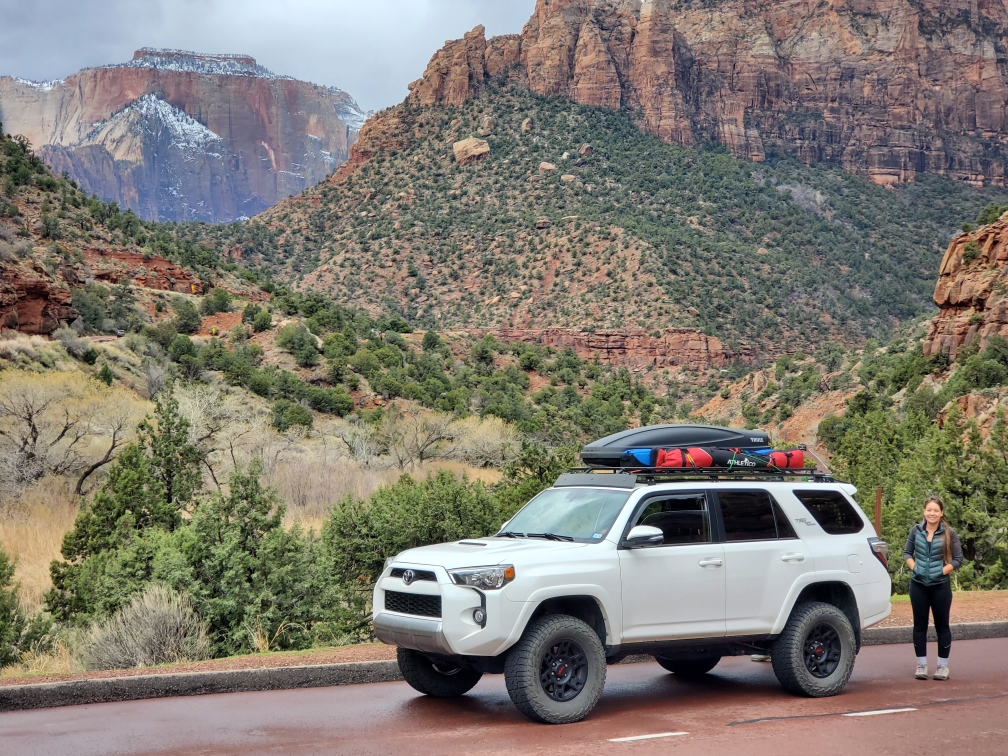
As I was traveling around the country in just the 4Runner, storage was becoming a bit tight. The real estate on the 4Runner roof seemed like the perfect opportunity to expand our storage space. After extensive research, I picked up a Gobi roof rack and a Thule cargo carrier.
Two years later, both are still installed on the roof. How have they held up over this time, and would I recommend them? Read on to find out!
Note: I don’t have any affiliations with either Gobi or Thule, so below are my unbiased opinions.
Why I picked a GOBI Roof Rack
When searching for a roof rack, I knew I wanted something that was the full length of the roof as to optimize storage space. I also wanted something sturdy enough to support anything I may throw at it in the future. I dreamed of taking the 4Runner out camping and sleeping on the roof; or perhaps a rooftop tent? Imagine a picnic on the roof where at least 3 people could sit and enjoy a snack while taking in the views. Or I could put a sleeping bag up there and stargaze, waiting for the milky way to show itself. With its 800-lb static load capacity, all of this was possible! (Note: It only has a 300-lb safe driving capacity load).
Article by: Tails of Wanderlust
Photo credit: Tails of Wanderlust (@tailsofwanderlust)
https://tailsofwanderlust.com
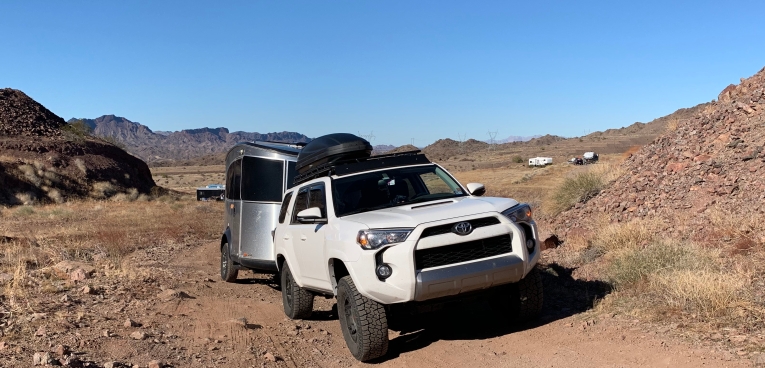
Needless to say, none of that has happened. There have only been two instances where my Gobi rack had a full person on it. First, I drove the 4Runner within inches of the Airstream Basecamp, jumped onto the Gobi and tried to reach the Basecamp solar panels to clean them. That was a big fail
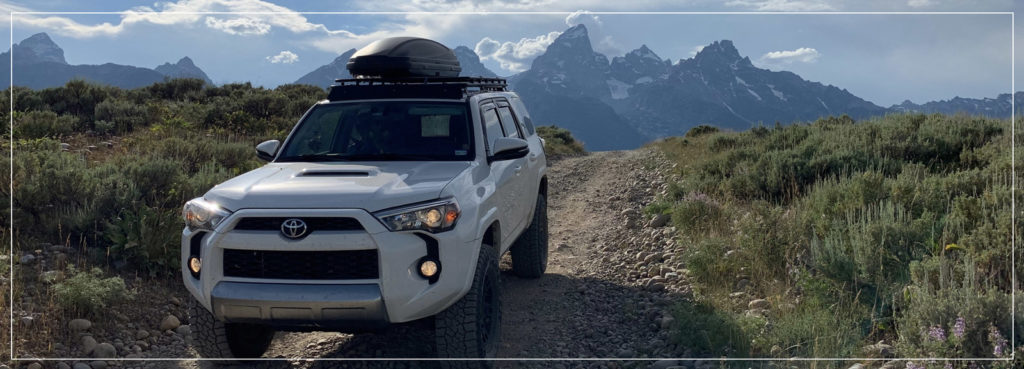
The second time, my friend wanted a picture of the Grand Tetons but we had some pesky bushes in the way. A quick climb up the Gobi ladder, and she was able to grab the shot she wanted.
Although I have never used the Gobi in the way I imagined, I still enjoy the versatility it provides. After two years being installed, I mostly use it to support the Thule cargo box on the two crossbars. On the rare occasion when others visit, I will strap additional cargo to the roof and the raised second bar keeps it securely in place.
GOBI Ordering & Shipment
Ordering the roof rack required quite a bit of logistical coordination. Gobi racks are made here in the USA and have a long lead time. When I ordered mine back in 2018, the average was 12 to 14 weeks. The rack also ships via freight, so it needs to be delivered to a house or normal address, instead of package pickup service. And finally, it requires two people to lift onto the roof during installation. While living solo on the road, all of this required extensive planning.

First, I placed the order for the rack online and added in my customizations. The regular Stealth 4Runner rack has a raised front bar, which allows room to install a roof rack light bar. I knew I wouldn’t be adding a light and didn’t like the raised look, so ordered mine with a level top bar. I also went for the option with the sunroof cutout so I could still enjoy the views and extra sunlight. At the time, Gobi was running a special where you received the rear ladder and cross bars for free, with the promo code GOBI100. I’m unsure if that code still works, but if you are looking to purchase a Gobi rack, I’d recommend searching around on forums for coupon codes

.
Next, I made sure to plan to have a house address around the 12-14 week mark. I was heading back to upstate NY for my brother’s wedding, so aimed to have it arrive while I was there. I also made sure to note within the order form that I travel full-time, and asked that they coordinate a shipping address prior to sending it out, just in case timing didn’t work out.
Thankfully timing did, although it arrived just past the 14 week mark. I ordered the rack in mid-March 2018, and it arrived at my parents’ near the end of June. It came via a large freight truck and was dropped off on a pallet outside the garage. The entire rack is one solid piece, so it was a very large box and took over the garage.
GOBI Rack Installation
Installation took a couple of days as we ended up running into a screw issue, but overall was not too bad. First, you have to remove the stock roof rails from the 4Runner. This part was actually pretty easy, as they have a small flap that you flip open to access all of the screws. The Gobi installation directions outline exactly how to do it, and are overall very user friendly and guide you step by step through the process.
Installing the roof rack support brackets came next, and this was probably one of the easiest parts of the entire install.
Next came the hard part. You have to lift the 70 pound steel rack onto the roof. This requires two people since you are lifting it high over your head and trying to avoid scratching the vehicle. Then you need to rest it down on only four of the six support brackets, as the two front brackets are installed after. This causes the rack to naturally lean forward, and you need to prevent it from hitting the roof. This entire process ends up being a struggle to balance the rack and not break anything.

From there, the rest of the rack installation was pretty easy and straight forward. Installing the wind deflector was only difficult when one of the screws became cross threaded, and we had to drill it out. You don’t receive any extra screws, so a trip to Home Depot to try to find a replacement was in order. Also, the wind deflector comes with a big “Gobi” logo on it. Thankfully, that part peels right off.
GOBI Roof Rack Overall Review
In the end, would I recommend the Gobi? If you are okay with the price tag, then yes; but I would suggest researching and digging into all the options out there before making the jump. There’s a variety of full roof racks or smaller baskets for much cheaper prices. You can also look into just adding cross bars to the stock roof rails. The 4Runner is a great model because there are so many aftermarket mods out there. Weigh all your options, and make sure it’s worth the $1,595+ price tag to you.
Why do I recommend it? It is a very solid and well built rack. Even with taking the 4Runner off-road, I have never worried about the Thule coming off the Gobi cross bars. All of the screws have stayed tight keeping the rack solidly in place. The second raised bar around the entire rack makes it very easy to tie additional gear up there and not worry about it blowing off. For the couple of times I wanted to access the roof, the rear ladder makes it easy to safely do so, even when I’m alone. And the whole setup just looks awesome. It gives the 4Runner a completely different look.

The only “issues” I’ve had with the rack are that the covering on one of the cross bars is peeling off. The steel underneath is now rusted due to this. Also, the rear hatch sometimes struggles to stay open under the weight of the ladder. You can upgrade the rear gas shocks to hold the weight, but this costs an additional $125 (per the last quote I received from Gobi), which I have not yet invested in.
Looking back, since I plan to keep the 4Runner for a long time and am continually changing my setup, the Gobi is worth it to me. It has also held up extremely well through almost 70,000 miles of travel. It’s one of the few racks out there that can hold as much weight as it does, and who knows, maybe in the future I will sleep on the roof!
The Thule Cargo Carrier
Since I wanted a way to lock gear onto the roof, an enclosed cargo box seemed like the best option. It would also keep all of the contents dry. I researched Yakima and Thule carriers extensively, and their products ended up being very similar in build, reviews and price. What caused me to purchase Thule is simply the fact that they are made here in the USA, and the company uses solar power for part of their manufacturing and office facilities.

Again dreaming of all the possibilities, I wanted a narrow Thule carrier which would allow me to have additional storage on the side for future expansion. I had been thinking about buying a canoe or kayak and wanted room on the rack to place those. So the narrow Thule 623 Force Alpine box was a perfect fit for me. I found the box available on Amazon and there was a warehouse deal, saving me about 15%. (To check for Amazon warehouse deals, look for the “New & Used from” link below the upper product description. Click on this link, and you can see any Amazon warehouse deals. These are typically products that others have tried and returned, and I use this feature all the time to get a better deal on Amazon products.)
The Thule I purchased is no longer available, but has been replaced by the Thule Force XT Rooftop Cargo Box -Sport Model. In terms of dimensions, the two boxes are very similar. Mine measures in at: 81.5″ x 24.5″ x 17″ and could hold up to 100-lbs of gear. The new version is: 74.75″ x 24.75″ x 16.75″, but is rated at up to 165lbs of gear. Both weigh about 32-36lbs empty.
Thule Installation
Due to the light weight of this box, I was able to install it myself. It was shipped via regular UPS and dropped off on my parent’s driveway. After excitedly opening up the packaging and being impatient to wait for others to help I just lifted it over my head and slide it on the cross bars. It was actually very easy to do. The mechanism it uses to attach to the cross bars is very simple and easy. The whole installation process took less than 10 minutes.

Thule Access and Use
Since the Airstream Basecamp doesn’t have much exterior storage, I use the Thule to store all of those type of items, from wheel chocks to leveling blocks to camping chairs. Sometimes it will get a bit finicky in regards to not wanting to close. It has to be perfectly lined up in order for the lid to lock shut. When the box is close to capacity, this can be difficult. But if I’m not trying to cram too much stuff into it, it closes completely fine. Just be sure to pull the lid down with both hands, in the two handle grooves, as this ensure everything lines up.
Thankfully, no one has ever tried breaking into the Thule. This may be because I boondock or stay in RV parks most of the time, and am usually nearby the truck. But even when taking it into towns to run errands, or parking it at airports while I fly out for work travel, it has never had any evidence of tampering.

Since I don’t have any running boards on the 4Runner, I access the cargo box by standing inside the passenger door or on the rear tire. I find that if I open the passenger door and just step inside, I can reach the Thule locking mechanism and everything stored very easily. If I need to access the back area of the box, I simply step over onto the rear tire and stand on that. One word of caution as a solo traveler, is you never know when something could go wrong. Lifting large or heavier objects in and out of the Thule box could result in an accident occurring. I always ensure my cell phone is in my pocket, just in case I do fall and need to call for help.
Overall Thule Review
I would say the Thule is one of the best purchases I have made. Having the additional storage on the roof which is locked and waterproof is a lifesaver. It’s a great place to store longer items, such as skis, which would not fit anywhere else in my setup. And it prevents me from having to store all of the dirty wheel chocks and leveling blocks in either the back of the 4Runner or in the RV.
After weekly, sometimes even daily use, over the past two years, it still opens and closes smoothly and has no cracks or issues. I’m quite impressed with how it has held up over the time. The only downfall is I no longer fit or can use regular car washes. So now the 4Runner just stays dirty!

Thule & Gobi Drive-ability
I’m often asked how the 4Runner drives with the Gobi roof rack and the Thule cargo box. If I’m driving in good conditions, you don’t even notice they are there. However, if there are high winds, the Thule definitely acts like a mini sail. Driving across 1-40 in New Mexico and Arizona there are usually very heavy cross winds. You’ll definitely feel those kinds of winds with a cargo box. I’ve never driven the 4Runner with just the Gobi rack, but feel with the lower profile it would not create too much of an issue on its own.
In regards to gas mileage, it does have an impact. Although I can’t quantify the Gobi and Thule by themselves since I also have a 3″ lift and bigger tires bringing down my gas mileage, I can say I went from almost 20 mpg prior down to 14 mpg with all of these mods (and that’s not even when towing). Gas mileage is definitely another important factor to think about if you go for any of the upgrades.
Conclusion
Overall I really love the rooftop setup that I have. Although the cost of the Gobi rack is a bit prohibitive, and the customer service has never been that great, the rack itself is incredible. It can hold one of the heaviest static loads at 800lbs and is well designed to fit perfectly on the roof. The ladder also allows me to carry one of my favorite accessories, a Trasharoo Trash Bag, where I can store my garbage without smelling up the inside of the 4Runner.
The Thule I would recommend hands down. Although a bit expensive itself, the additional secured storage that it provides is critical to making my tiny living setup work. I’m so thankful I don’t have to put muddy wheel chocks into my RV or the back of the 4Runner.
Article by: Tails of Wanderlust
Photo credit: Tails of Wanderlust (@tailsofwanderlust)
https://tailsofwanderlust.com


